Category Archives: Dinner

Cauliflower Pizza Crust- Healthy and Gluten Free!

A few months back there was a viral Facebook post about cauliflower breadsticks that got my mind going. If you could make breadsticks with broken down cauliflower, what else could you make?! I love the idea of making unhealthy foods healthier by upping the veggie content so the idea of pizza without flour fascinated me. This was my second attempt at making a cauliflower pizza dough. The first time it felt undercooked and didn’t crisp at all. I think this time around I got it very right by flipping the dough halfway through the cooking process and blotting the moisture off with a paper towel(Much like I did with my zucchini noodles in veggie lasagna) . The dough was slightly chewy with crunchy crisped edges. Obviously it’s a bit more work than ordering papa johns but I found it to be a worthwhile kitchen adventure!

20140325-140705.jpg

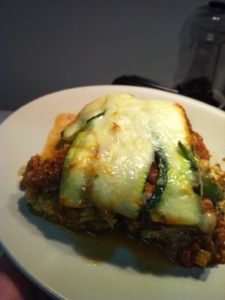
1. Cauliflower Snow 2. before toppings 3. Finished pizza


Cauliflower Pizza Crust
1 large head of cauliflower
1/4 cup Parmesan cheese
1/4 cup mozzarella cheese
1 tsp Italian seasonings
1 tsp garlic powder
1/2 tsp onion powder
1/2 tsp crushed red pepper
1 tbs corn meal
1 egg

Pizza Toppings and Sauce of your choice!

Preheat oven to 450 with a pizza stone on the middle rack. While the stone heats up prepare the cauliflower.

Working in small batches pulse cauliflower in a food processor until it is finely shredded. It will have the consistency of fine snow. Microwave the cauliflower ‘snow’ for 5 minutes. Remove from microwave and let cool in the refrigerator for about 20 minutes.

When the cauliflower is cool to the touch wrap it in cheesecloth and squeeze out as much liquid as you can. Transfer to a large bowl and combine with mozzarella, parmesan, egg, corn meal, and spices. Mix until everything is evenly distributed- I find it’s best to use your hands for this step.

Spray a piece of parchment paper with cooking spray and turn out the dough ball into the middle. Press and sculpt into a round shape about 1/4 of an inch thick.

Transfer parchment paper with dough on it to the pizza stone and bake for 15 minutes. Flip crust by sandwiching between two cookie sheets with a fresh piece of sprayed parchment and bake on the other side for 15 more minutes.

Remove from oven and add sauce and toppings. Return to oven until cheese is melted- about 6 more minutes.

Enjoy!
Charlie


1 Comment

Filed under Dinner, Gluten Free, Lunch, New York City, Party Entertaining Ideas, Small Kitchen Cooking, Thrifty Adventures, Vegetarian

A Thrifty Thanksgiving: Apple Cider Glazed Faux Turkey (Quorn Turk’y Roast)

I think being a vegetarian around the holidays can be the WORST. Every big holiday meal is centered around a beautiful roasted turkey.  Yes there are all sorts of delicious side dishes that can be made to offset not being part of the main event but what happens when you throw a thanksgiving dinner for a group that consists of mostly vegetarians?? This past thanksgiving I was faced with this dilemma.

Coming from Georgia, the holidays are always a big to-do in my family. Believe me- southerners know how to fill a table with fabulous food. My favorite was always a spicy cajun turkey. I tried my best last Thanksgiving to bring a taste of the south up north and make it as vegetarian friendly as possible.

20131011-160551.jpg

My findings include a tasty way to cook the fabled “tofurkey”– Let’s be honest: this faux log of a “bird” isn’t going to fool anyone. It’s awkward and funny looking BUT if seasoned correctly it can stand in and make quite an impression.  There are several brands that you can try but my favorite in all of my tastings was the Quorn Turkey Roast. If you’ve been a longtime reader of Thrifty Foodies you’ll know that I cook often with Quorn products because they don’t contain soy and have the most meat-like texture out of the variety of vegetarian products on the market.

As with most faux turkeys they all come packaged with ‘suggested’ cooking methods. Go ahead and do everyone a favor and throw those directions in the trash. The only way you’ll make this substitute taste remotely holiday worthy is to give it a  little TLC in the form of marinade and spices. Last year I cooked mine marinaded in veggie stock with a TON of poultry spices. I’ve whittled it down to a tasty apple cider marinade that makes the entire house smell amazing as guests arrive.  It is a little time intensive (as are most real turkeys) but give it a try and I guarantee you wont be disappointed.

20131011-160613.jpg

Apple Cider Glazed Faux Turkey (Quorn Turk’y Roast)

1 Quorn Turkey Roast
1 tsp poultry seasoning
1/2 tsp rosemary
1/2 tsp thyme
1/2 tsp sage
a few grinds of pepper
2 cups apple cider
1/4 cup soy sauce
1 small tart apple
mixture of baby carrots, chopped onion, parsnips, celery, cubed sweet potatoes, and cubed red potatoes
 
Remove all packaging from Quorn roast- Including the plastic wrapper that they suggest baking it in. Place roast in a gallon sized ziplock bag along with apple cider, soy sauce, rosemary, thyme, sage, and pepper. Close bag and shake it up to mix everything together. Place in the refrigerator and marinate overnight. 
 20131011-160601.jpg
 
When you are ready to cook the roast fill the bottom of a baking dish with a mixture of baby carrots, chopped onion, parsnips, celery, cubed sweet potatoes, and cubed red potatoes. Make a small indention for the roast to sit in the middle of the veggies and pour the sauce over everything. Make a few indentions down the body of the roast and slip a few pieces of the tart apple into them. Cook on 350 degrees for 1 hour and 20 minutes covered with aluminum foil. Uncover and cook for 20 more minutes.  At this point if your roast isn’t as golden brown as you would like it to be feel free to remove it from the pan and place it under the broiler for 5 minutes. 
 
 
Enjoy!
~Charlie
The Thrifty Breakdown:

Quorn Turkey Roast- $8.50
Carrots- bag for for $1.50
Sweet Potatoes- 2 for $1.00
Red potato- 1 for $0.25
Onion- 1 for $0.50
Apple Cider- 1/2 gallon for $2.50

Kitchen Staples: poultry seasoning, rosemary, thyme, sage, soy sauce, apple

This thrifty thanksgiving substitute made enough to serve four totaling $14.25 or around $3.50 a serving.

Leave a comment

Filed under Dinner, New York City, Party Entertaining Ideas, Small Kitchen Cooking, thrifty tips, Vegetarian, Winter

Pumpkin Carbonara (with vegetarian bacon)

20131028-195801.jpgLiving with a couple of vegetarians makes me yearn for the smell of bacon on lazy weekend mornings. Although I’m prone to get my fix when we hit up the diner after a late night, I’ve found there aren’t many ways to replicate that bacon taste in vegetarian land. The closest substitute I’ve come across is Morningstar bacon strips. I’ve found that I can never get the crunch I’m craving without a little bit of extra effort. After microwaving them according to the package directions I like to cut them into bits and put them under the broiler for 3 minutes in order to crisp them up. This pasta dish is the perfect place to use my ‘fakeon’ bits. I’ve been experimenting all month with pumpkin recipes and really enjoyed this savory take on an Italian classic.

Pumpkin Carbonara (with vegetarian bacon)
1/3 cup pumpkin purée
1/2 cup grated Parmesan cheese
2 eggs
4 strips Morningstar faux bacon(or real bacon if you’re not cooking for the vegetarians)
1 tsp rosemary
1 tsp sage

Bring a pot of salted water to a boil and cook pasta until al dente. While the pasta is cooking prepare your faux bacon and sauce. In a small mixing bowl stir together pumpkin purée, parmesan, rosemary, sage, and eggs. Once the pasta is finished cooking remove from heat and reserve 1 cup of the starchy cooking water. Drain pasta but DO NOT rinse. Toss pasta in egg mixture for 2 minutes until the cheese is melted and egg is cooked. If the sauce is too think for your tastes add in starchy water a few tablespoons at a time.

Enjoy!
-Charlie

The Thrifty Breakdown:

Pumpkin- 1 can for $2.50
Pasta- 1 box for $1.50
Parmesan Cheese- $3.00
Eggs- $1.50 for 12- $0.25
Bacon- $4.00 for 18- $0.88

Kitchen Staples: rosemary, and sage

This tasty autumnal pasta made enough to serve three and have a teensy bit of leftovers to snack on later totaling $8.15 or $2.17 a serving.

Leave a comment

Filed under Dinner, Lunch, Small Kitchen Cooking, Vegetarian

Zucchini Lasagna

When Tom and I first started dating it were relatively close to valentines day. It was in that super awkward time period where of course you care about each other but are by no means madly deeply in love. Holidays that are so focused on love/being in love are awkward for newbie couples. In an effort to push against the social grain we opted for a sensible dinner at home with a small gift exchange as opposed to an overpriced NYC night out. Being the lame retail employee I was, I’m pretty sure I bought him a shirt… being the son of a chef he is, Tom bought me a mandoline. Within a week I had almost sliced half my finger off trying to slice potatoes but I embraced all of the new possibilities this toy opened up in the kitchen. When I heard of the idea of slicing zucchini thin and substituting it for lasagna noodles my mind was blown. I’m in love with the idea that you can replace most of the not so healthy ingredients in a gut bomb with fresh vegetables.

20130728-225400.jpgNoodle Free Zucchini Lasagna

3 Large zucchini- sliced very thinly on a low mandoline setting

1 green bell pepper, diced

1 large onion, diced

4 cloves garlic, diced

1 lb ground beef(or meat substitute)

1 jar of pasta sauce

1 small can of tomato paste

1/4 cup red wine

1/4 cup fresh basil, chopped

2 tbs italian spices

2 cups baby spinach, rough chopped

1 cup broccoli florets, rough chopped

1 cup mushrooms, rough chopped

1 cup mozzarella cheese

1 cup parmesan cheese

1 cup ricotta cheese

——-

20130728-225424.jpg

Zucchini noodles releasing their water…

Preheat the oven for 350 degrees. Using a mandoline, thinly slice the zucchini into long, thin, noodle-like strips. Arrange strips onto two baking sheets, lightly salt both sides, and bake for 15-20 minute to release their water. Don’t let them brown too much. When you remove them from the oven use paper towels to pat them dry, removing any of the extra water. This step is important. If you don’t try to get rid of the water in the zucchini, it will release it during the cooking process resulting in a soupy final product.

While the zucchini is baking prepare the sauce. In a medium sauce pan brown the ground meat. Drain and then sauté with the green pepper, onion, and garlic for about 3 minutes until the onion starts to soften. Add red wine, pasta sauce, and tomato paste. Bring to a slow simmer for a five minutes. The tomato paste will make the sauce thicker than your regular pasta sauce in order to combat any extra water from the zucchini.

As the sauce simmers, stir together the ricotta cheese, italian spices, basil, egg, and parmesan cheese. By now the zucchini ‘noodles’ should be cooled a little and the sauce should be finished. Assemble the lasagna in a casserole dish in this order: sauce, zucchini ‘noodles’, ricotta mixture, veggies, mozzarella cheese. Repeat layers until the pan is full finishing up with a layer of noodles topped off with a sprinkle of mozzarella. Bake on 350 for 45 minutes covered, followed by 15 minute uncovered. If needed cook under the broiler for a few minutes to crisp up the cheese topping.

20130728-225446.jpg

Enjoy!

~Charlie

1 Comment

Filed under Dinner, Lunch, Party Entertaining Ideas, Seasonal Cooking, Small Kitchen Cooking, Summertime, Vegetarian

Fiesta Salad with Cilantro Lime Dressing

I’ve been on a bit of a salad kick lately. We had a ridiculously hot week this past week and the last thing I wanted to do was turn on the oven. Living with two vegetarians I’m always trying to make meals that have all sorts of alternative proteins to meat in them. This chopped salad with a Mexican flair uses chickpeas and black beans as a meat substitute and cuts down fat by substituting Greek yogurt in the dressing for mayo. I think this is a great jumping off place for any salad and is hearty enough to stand in for a meal. Feel free to substitute other fresh vegetables that may be available at your summer farmers market or to even top with some tortilla strips.

Fiesta Salad with Cilantro Lime Dressing

For the salad:
2 heads romaine lettuce
1 can of mexicorn, rinsed
1 can black beans, rinsed
1 can chickpeas, rinsed
1 tomato
1 red onion
1 cucumber
2 turnips
1 avocado
Feta cheese

For the dressing:
1 container nonfat plain Greek yogurt
1/3 cup lime juice
2 tbs olive oil
2 tbs honey
2 tbs cilantro- about a handful
1/4 tsp thyme
1/4 tsp cumin
1/2 tsp garlic powder

Rough chop and wash vegetables and lettuce. A helpful tip for cutting romaine lettuce is to make long slits down the large middle ribs all the way around and then make 1/4 inch wide perpendicular cuts working from the top down. Combine in a large bowl with rinsed corn and beans. Place the bowl in the refrigerator while you prepare the dressing. To make dressing combine lime juice, yogurt, olive oil, honey, and spices in a food processor. Pulse blend a few time so the cilantro isn’t entirely liquified. The dressing will be more of the consistency of a vinaigrette than of ranch dressing. Drizzle heaping bowls of the lettuce mixture with the lime cilantro dressing and top with a sprinkle of feta cheese and some avocado.

20130722-090759.jpg

Leave a comment

Filed under Dinner, Lunch, Quick & Easy, Side Dishes, Small Kitchen Cooking, Summertime, Vegetarian

Healthy Summer Vegetable Chowder

It’s been a crazy busy summer so far. I’ve been trying to stay out of the sweltering hot kitchen as much as possible.  When the weather heats up I try to stick to one pot meals, avoid the oven, and cook  anything that is quick to prepare and keeps me out of the heat. Last week I made this healthy chowder that tasted extremely fresh.  I love the way potatoes substituted the thickness usually added to chowder by heavy cream and butter. It was fresh, simple, and used my favorite veggies from summer.  The best part was that it tasted just as delicious cold as it did hot!

Healthy Summer Vegetable Chowder
2 heads of broccoli, rough chopped
2 cups frozen corn 
3 cups veggie stock
1 cup milk
1 large russet potato, diced
1 onion, diced
3 garlic cloves, diced 
1/4 cup flour
1 tsp. thyme 
1/4 cup bacon bits(or Morningstar Vegetarian Bacon if that’s your game)
 

In a large soup pot heat 2 tablespoons of olive oil. Sauté garlic and onions for about 6-7 minutes until they begin to soften. Working quickly, sprinkle flour over onion mixture and stir constantly for 1 minute.  Make sure that the flour doesn’t turn brown and burn. Add veggie stock, potatoes, and thyme to the pot. Bring mixture to a boil and simmer for 7-8 minutes until the potatoes are cooked through. Add broccoli, corn, and milk and continue simmering for an additional 5 minutes until slightly thickened and the broccoli is cooked to a bright green.  Season with salt & pepper and serve topped with bacon bits.

photo


Enjoy!

Charlie

Leave a comment

Filed under Dinner, New York City, Summertime, Vegetarian

Rosemary Crusted Linguine

I think this year will be the first time I’ve successfully kept a herb garden alive for more than one month without something going terribly wrong. In my NYC lifetime I’ve had basil burnt to a crisp by a heat wave, pigeons nesting in my cilantro, and entire plants flown away(roots and all) by the birds in the alleyway. This year is different. I finally have an exterior window IN THE KITCHEN with all day southern sunlight. Those birds don’t have a chance!
This year I’m growing basil, cilantro, mint, and rosemary in the window and I’ve been on the look out for ways to add them to my dinners. I found the base for this recipe in Vegetarian Times but switched things around with some basil, vidalia onion, and more spices. It was the perfect way to utilize what’s been growing in my window box!
photo
Rosemary Crusted Linguine
1/2 package linguine
2 green peppers, cut into strips
1/2  vidalia onion, cut into slivers
1/2 cup Parmesan Cheese
1/2 cup panco bread crumbs
3 tbs olive oil
2 tbs apple cider vinegar
1/4 tsp crushed red pepper
3 tsp fresh rosemary, chopped
3 tsp fresh basil, chopped
3 garlic cloves, chopped
 
Preheat oven for 350 degrees and start a pot of water boiling. In a small bowl combine 2 tbs of the Parmesan cheese, 1 tbs olive oil, 1 1/2 tsp of the rosemary, and bread crumbs until mixture is the consistency of moist sand. Spread  crumbs onto a small baking sheet and bake for 7-9 minutes until golden brown.
 
Meanwhile, add pasta to the boiling water and heat the remaining 2 tbs of olive oil in a large sauté pan. Add garlic, crushed red pepper, green peppers, onion, and remaining rosemary. Season with salt and pepper and sauté until slightly limp- about 6 minutes.
 
By this point the breadcrumbs should be finished. Remove from the oven and set aside to cool. When the peppers have softened and the pasta is finished cooking, ladle out 1/2 cup of the starchy pasta water into the peppers and add apple cider vinegar. Remove from heat and stir in remaining parmesan cheese while tossing with drained pasta. Sprinkle breadcrumbs on top of each portion before serving. 

1 Comment

Filed under Dinner, Lunch, New York City, Party Entertaining Ideas, Quick & Easy, Small Kitchen Cooking, Summertime, Vegetarian

Crisp Socca with Burrata, Greens, and Olive Dressing- A Thrifty Foodies review of Williams Sonoma’s Weeknight Gluten Free

When Charlie asked me to write a guest post using the new Weeknight Gluten Free cookbook from Williams Sonoma and Kristine Kidd I was so excited.

Cookbook.jpg

Weeknight Gluten Free, 2013

Williams Sonoma cookbooks are usually really well written and crafted, but I have only bought them as presents for family and friends.  Having Celiac’s Disease, there was little there for me personally until recently-  Which is wonderful!  Looking through the cookbook I wanted to choose a recipe that I had never made before, so it would be a challenge and I could try something new.  Lots of the recipes were very simple, and truly were week night meal fare. Nothing overly complicated.  The one snag I hit was that most of the recipes also called for dairy products of some sort and I am allergic to cow’s milk. That narrowed down my choices considerably however, after discussing with Charlie the possibility of making a substitution, I settled on the recipe for Crisp Socca with Burrata, Greens, and Olive Dressing.  Burrata is a smooth mozzarella style cheese, and there really is nothing similar to it.  I decided to use a mild chevre instead to still get that smooth texture.

The batter was super simple to make and only took me two minutes. You can either use it immediately or leave it overnight in the fridge. That means you could whip it together in the morning, pop it in the fridge, and then it will be ready to go when you get home at night.

batter.jpg

I used the batter immediately.  The recipe called for the use of two 9″ cake pans with which to broil the batter in.  This past year I changed over all my baking pans to silicone pans – oops!  I am pretty sure broiling my silicone pans would not have the desired effect.  However, I have an old cast iron pan that I absolutely adore and laughs in the face of a broiler.  Its 11 inches and not 9, but I figured it would be fine.  The recipe does make mention that you must watch your broiler, and indeed you must.  The difference between beautiful golden brown and charred unhappiness is a matter of seconds.  Luckily, the first one I caught right before the charred unhappiness appeared, and the second one came out perfect.

skillet.jpg

The vinaigrette was also super easy to make. I don’t have a food processor so I simply chopped up the pitted olives as fine as I could and then used the old fashioned method of whisking by hand until the vinaigrette came together.  Easily done and mighty tasty too!  I assembled the dish according to the directions and it made a fine looking plate.

It was tasty, and when I make it again I will try some different toppings.  I am thinking that adding chicken marinated in olive oil, sea salt, thyme, and rosemary would also be delicious.  Or instead of cheese, a creamy avocado would add a wonderful contrast to the bitter arugula and briny olives.  This seems like a very versatile dish that could easy support whatever leftover veggies you may have in your fridge to throw together – like roasted root vegetables, or sauteed summer squashes and asparagus.  Any way you put it together, its a very yummy and satisfying light meal.

____________________

finished plate.jpg Crisp Socca with Burrata, Greens, and Olive Dressing

from Weeknight Gluten Free

 
Crisp Socca
1 cup garbanzo bean flour
1 cup water (room temperature)
2 Tbsp olive oil
1 1/2 tsp fresh rosemary minced
3/4 tsp salt
generous dash of pepper
 
 
In a bowl combine all the ingredients and whisk well until smooth.  Use immediately or cover and let sit at room temperature for 30 minutes to 2 hours, or overnight in the fridge.
 
Preheat your oven to 500 degrees, and place your rack at the very top.  Once the oven is fully heated, change it to broil and place your pan(s) in the oven and heat for 2 minutes.  Carefully remove the hot pans and add 1 Tbsp oil to each and swirl to coat the bottoms.  Return to the broiler for another 2 minutes or until the oil is smoking.  Carefully remove the pan(s) from the oven and divide the batter into each (or half into one and broil one at a time, as I did) and swirl the batter to cover the bottom.  Return to the broiler and broil until deeply browned in spots, watching carefully, for 7-12 minutes.  Serve right away.  Makes 2 crisp socca.
 
Topping
3/4 cup pitted Kalamata olives
1/3 cup olive oil
2 Tbsp red wine vinegar
fresh ground pepper
4 cups of arugula or baby greens
8oz of Burrata cheese
 
Place olives in a food processor and process until finely chopped.  Add oil and vinegar and blend to make a dressing.  Season to taste with pepper. (The olives probably contain plenty of salt, so no more should be needed.)
Place the arugula in a bowl with half of the dressing and toss to coat.
Place the socca onto a plate, slice the burrata and spread over the socca.  Drizzle the remaining dressing and then top with the dressed greens and serve right away.

_______________________

Debbi Hobson, our newest guest contributor on Thrifty Foodies, is a costumer and Gluten Free baking expert living in NYC. She is currently working on her first Gluten Free cookbook which will be released later this year. Follow her GF adventures at Debbi Does Gluten Free!

Leave a comment

Filed under Dinner, Gluten Free, Lunch, Small Kitchen Cooking, Thrifty Adventures, Vegetarian

Quinoa Black Bean Burgers

Hello Thrifty Foodies! I’m a long time reader and happy to be making my first contribution to the blog.

photo 4

As we get closer to summer, everyone is bringing out the grill for hotdogs and burgers. As a vegetarian, it isn’t always easy to find a delicious veggie burger that isn’t processed or expensive. I found this recipe on a bag of quinoa I bought and couldn’t wait to try these delicious burgers. I’m new to cooking and usually intimidated by recipes with more than 5 ingredients. But these patties were easy to make and yummy. Plus, even my meat-eating friends enjoyed the final product!

Ingredients (Makes 6-9 patties)

  • 6 Tbsp olive oil
  • 3/4 cup red bell peppers, diced
  • 2 cloves garlic, minced
  • 1 large shallot, diced small
  • 1/2 cup fresh cilantro leaves
  • 1 can black beans, drained
  • 3 cups quinoa, cooked in chicken broth (or water or veggie broth!)
  • 1 egg (optional, helps keep the burger together)
  • 2 cups bread crumbs
  • Salt, pepper, other seasonings to taste

Step 1: Cook Quinoa

The first step is to make the quinoa using some sort of broth or just water. You need about 3 cups of cooked quinoa when you’re done. About 1/4 cup of dry quinoa makes 1 cup of cooked quinoa. I just made 1 cup of dry quinoa and once it was cooked measured out 3 cups. (Any extra can be used for a bonus meal later!)

photo 1

Place 1 cup dry quinoa and 2 cups of water (or broth) in a pot. Bring to a boil. Reduce to simmer and cover for 10-15 minutes or until all of the water is gone.

Step 2: Sauté Veggies

While the quinoa is cooking, put olive oil in a pan and sauté the peppers for about 3 minutes. Then add in the garlic and shallot while continuing to sauté until they’re all soft. Then remove from heat and sit off to the side to let cool.

Step 3: Black Bean Mix

Place the drained can (15oz) of black beans into a pot with the cilantro. Add in the sautéed veggies stirring them all together. Using a food processor (or a Magic Bullet!) pulse together until chunky. It will look kind of like a paste.

photo 3

Step 4: Patty time!

Combine the Black Bean Mix with the 3 cups of cooked quinoa into a pot, mixing everything together. (At this point, you could add an egg to keep it together a little better, but not necessary!) Using your hands, make patties with the mix.Using wax paper to separate them, place them on a plate in the fridge or freezer for 10 minutes. Put breadcrumbs and any seasonings you want to use into a bowl wide enough to fit a patty.After the patties have cooled, coat them with the crumbs and fry them in the pan of oil. Each side will take about 3 minutes.

Step 5: Enjoy 🙂

photo 5

Dress your burger up with whatever you’d put on a meat burger. It’s yummy, healthy AND thrifty!

**Recipe is vegetarian (using veggie broth or water), vegan (without the egg) and gluten free (without breadcrumbs).**

Happy Summer!

1 Comment

Filed under Dinner, Lunch, Small Kitchen Cooking, Summertime, Vegetarian

Chinese Casserole

Hey All! After being referenced one too many times (and in a desperate attempt to avoid doing real work), I’ve decided to start posting some recipes myself!

A while back, Charlie and I decided to revisit some of our favorite childhood dishes. Whether raised by gourmet chefs or the culinary challenged, everyone has those few meals that stick out from your childhood. Charlie started the party with Chicken Divan (or Faux-van in our house), and I followed up with this family classic:

Image

“Chinese Casserole,” so named for its soy sauce and chow mein noodles, was in heavy rotation at my house for many, many years.  I’d almost forgotten how good it was until I remade it for our “blast for the past” tour.  I’ve taken my parents’ tried-and-true recipe and modernized it a bit. Here’s how you make it (note–this is a single batch, I made a double for my photos because we like it that much):

Chinese Casserole
For the mixture:
1lb of ground beef (I used Meatless Crumbles)
2 stalks of celery, finely diced
1/2 a medium onion, finely diced
2 cups of cooked rice
1 clove of garlic, finely diced
black pepper to taste
 
For the sauce*:
1 can of cream of celery soup
1/3 cup of soy sauce
1/2 cup of water
 
For the topping:
1/2-1 cup of chow mein noodles

*The sauce is your opportunity to mess around with the flavors. I’ve played around with tamari, hoisin sauce, sriracha, red pepper flakes. Have fun, find flavors you like!

Cook rice according to instructions, preheat oven to 350 degrees.
Heat a tablespoon of oil in a sauté pan over medium heat. Add the celery, onion and garlic. Saute until the vegetables begin to soften, add the ground beef and cook through.
 
While the mixture is cooking, combine the sauce ingredients in a large bowl. As I mentioned before, you should play around with the additions/proportions in order to find the taste that you like best. I usually add a few squeezes of sriracha because we like things on the spicy side in our kitchen.

Image

Once the rice and ground beef mixture are cooked, add the sauce to the mixture. Then add rice, ½ cup at a time until you have the right consistency. The mixture should be loose but not liquid.  Something like this:

Image

I have found that two cups is about the right proportion, but remember that because the rice is already cooked, it is not going to soak up nearly as much of the liquid as it would if it were raw. Scoop the mixture into a 9×9 pan that has been sprayed with non-stick spray. Spread the chow mein noodles evenly over the top. Cover with aluminum foil and bake for 20-25 minutes. Remove the foil and bake for another 10-15 minutes until the chow mein noodles have browned and the mixture is bubbly. 

Image

Let cool and enjoy!

~Tom

Leave a comment

Filed under Dinner, Quick & Easy, Small Kitchen Cooking, Vegetarian