Summer Corn Salad

20140914-152539.jpg

I know- it’s been an eternity.

Between the Met season closing, summer vacations, and a summer filled with moving apartments I feel like I’ve been living on takeout food. Time to change that habit! We just moved into an amazing apartment in midtown with the most beautiful kitchen that gets me SO excited to cook again.

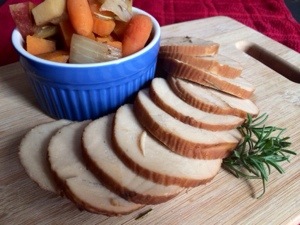
We had our very first sit down dinner party this past weekend with some of our friends and their adorable dog Durham. Durham dined on birthday doggie treats, a few cards against humanity, and an old cork coaster— we had a green market inspired pasta with a summer corn salad. Being two stops from the Saturday Union Square green market is quickly becoming one of my favorite parts about living in midtown. It’s tomato season in the market and I feel like every vendor is selling pints of mixed heirloom tomatoes and fresh herbs. The tomatoes give this salad a needed pops of color while the herbs lend an earthy undertone. I know I must sound like Ina Garten when I say to use fresh herbs but they really make all the difference in this recipe. There are so little ingredients involved in this salad making it worthwhile to invest in herbs from the market!

Summer Corn Salad
3 cups of corn kernels(I used two cups of Trader Joes fire roasted corn and one cup of regular corn)
1 pint of cherry tomatoes, quartered
1/2 red onion, finely diced

1/3 cup fresh basil
1/4 cup fresh rosemary
1/4 cup fresh oregano

1/4 cup olive oil
2 tsp white wine vinegar
1/4 tsp honey
Juice from 1/2 a lemon

In a blender combine fresh basil, rosemary, and oregano with the olive oil, honey and vinegar. Add a few grinds of pepper and a pinch of salt. Blend until smooth.

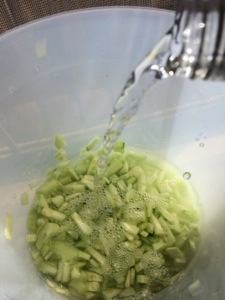
Meanwhile in a large bowl stir together corn, red onion, and cherry tomatoes.

Just before serving pour dressing over corn mixture and stir together. Garnish with a few pieces of torn basil.

Enjoy!
-Charlie

Leave a comment

Filed under Small Kitchen Cooking

Honey Balsamic Goat Cheese Dip

20140625-141918.jpg

A few weeks ago Tom and I were invited to an impromptu picnic dinner in Central Park. We both were racking our brains for ideas of something tasty to bring along when I remembered a killer taste combo we had this winter at Indie Food & Wine- goat cheese and honey. They serve a crostini topped with smeared goat cheese and honey. Of course on short notice nobody wants to make and transport crostini to a picnic so we set out to make a dip. I quickly found a base recipe I could screw around with to make a relatively healthy fruit/pita chip/veggie dip.

Honey Balsamic Goat Cheese Dip
1 cup goat cheese
1/3 cup plain Greek yogurt
3 tbs honey
2 tbs balsamic vinegar

Crumble goat cheese into the bowl of a food processor. Add yogurt, honey, and balsamic and pulse until smooth. Feel free to add a teaspoon or two of milk if you want it to be a different consistency.

We served ours with apple slices and crusty bread! Enjoy!
-Charlie

Leave a comment

Filed under Small Kitchen Cooking

SUMMER DRINKS: Cucumber Vodka & Ginger Beer

Summertime is HERE! I can’t think of a better way to celebrate the weather change than with a few drink recipes. A few weeks back we celebrated my roommate Sara’s move back south for a gig at one of our favorite bars. The Art Bar in the west village. They have a pretty stellar mixed cocktail menu and I became OBSESSED with one of their choices. Enter my summer lover: cucumber vodka and ginger ale.  There are all sorts of crazy vodka infusions on the market from jalapeño to tomato. What bummed me out was how expensive these delightful seasonal flavors were. I discovered with a few days and an cheap ish bottle of vodka I could make my very own Cucumber Vodka! Of course using these guidelines you can make your own vodka infusions in many flavors. I also set out to figure out how to make a ginger beer concentrate to add to soda water. I’m in love with the spicy nature of the final product. I’ve been splashing it into my soda water all weekend.  The process of making it uses a food processor rather than simmering the ginger over low heat keeps things nice and spicy!


20140603-130914.jpg
Cucumber Vodka
2-3 Cucumbers 
1 medium size bottle of vodka- nothing too fancy but defiantly not the cheep plastic handle

Peel and finely dice the cucumbers. The point is to get as much surface area as possible on the cucumber for the vodka to come in contact with while it’s infusing. Put cucumber bits into a pitcher, pour an entire bottle of vodka over the top, and place in the refrigerator for 5-10 days. If you infuse any longer things will start to taste bitter.  After your infusing days are up strain through a fine mesh strainer and funnel back into the vodka bottle. Keep chilled in the refrigerator and enjoy!


20140603-130858.jpg
Ginger Beer Concentrate
1 Large Piece of Fresh Ginger(about 4 inches)
1/3 cup sugar
1/3 cup fresh lime juice
1 cup water
 
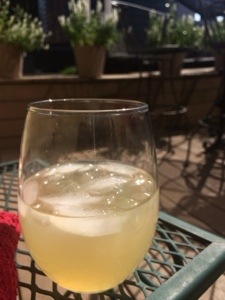
Peel ginger and place pieces into a food processor. Puree with 1/2 cup of water until smooth. Transfer pulp to a fine mesh strainer over a bowl and try to remove as much liquid as you can.  Scrape the remaining ginger pulp out of the strainer and return it to the food processor. Add lime juice to the pulp and puree  for about a minute.  Repeat the same steps of pushing it through the strainer trying to remove as much liquid as possible.  Return whatever remains of the ginger pulp to food processor and add sugar and the remaining 1/2 cup of water. You can add more sugar depending on if you want it the final product to be sweeter.  Pulse for another minute and then repeat the straining process.  Keep your ginger concentrate in the refrigerator for up to a week. Add a splash to ginger ale to give it more kick. Mix it on a 1 to 3 ratio with soda water and a lime slice for a refreshing summer drink!
 

Hopefully these will help you kick of summer in style- Enjoy!

Charlie


Leave a comment

Filed under Drinks, Party Entertaining Ideas, Quick & Easy, Summertime, thrifty tips

Cauliflower Pizza Crust- Healthy and Gluten Free!

A few months back there was a viral Facebook post about cauliflower breadsticks that got my mind going. If you could make breadsticks with broken down cauliflower, what else could you make?! I love the idea of making unhealthy foods healthier by upping the veggie content so the idea of pizza without flour fascinated me. This was my second attempt at making a cauliflower pizza dough. The first time it felt undercooked and didn’t crisp at all. I think this time around I got it very right by flipping the dough halfway through the cooking process and blotting the moisture off with a paper towel(Much like I did with my zucchini noodles in veggie lasagna) . The dough was slightly chewy with crunchy crisped edges. Obviously it’s a bit more work than ordering papa johns but I found it to be a worthwhile kitchen adventure!

20140325-140705.jpg

1. Cauliflower Snow 2. before toppings 3. Finished pizza


Cauliflower Pizza Crust
1 large head of cauliflower
1/4 cup Parmesan cheese
1/4 cup mozzarella cheese
1 tsp Italian seasonings
1 tsp garlic powder
1/2 tsp onion powder
1/2 tsp crushed red pepper
1 tbs corn meal
1 egg

Pizza Toppings and Sauce of your choice!

Preheat oven to 450 with a pizza stone on the middle rack. While the stone heats up prepare the cauliflower.

Working in small batches pulse cauliflower in a food processor until it is finely shredded. It will have the consistency of fine snow. Microwave the cauliflower ‘snow’ for 5 minutes. Remove from microwave and let cool in the refrigerator for about 20 minutes.

When the cauliflower is cool to the touch wrap it in cheesecloth and squeeze out as much liquid as you can. Transfer to a large bowl and combine with mozzarella, parmesan, egg, corn meal, and spices. Mix until everything is evenly distributed- I find it’s best to use your hands for this step.

Spray a piece of parchment paper with cooking spray and turn out the dough ball into the middle. Press and sculpt into a round shape about 1/4 of an inch thick.

Transfer parchment paper with dough on it to the pizza stone and bake for 15 minutes. Flip crust by sandwiching between two cookie sheets with a fresh piece of sprayed parchment and bake on the other side for 15 more minutes.

Remove from oven and add sauce and toppings. Return to oven until cheese is melted- about 6 more minutes.

Enjoy!
Charlie


1 Comment

Filed under Dinner, Gluten Free, Lunch, New York City, Party Entertaining Ideas, Small Kitchen Cooking, Thrifty Adventures, Vegetarian

Ginger Margarita

Rumor has it we *might* make it to 60 degrees outside today. This has been the never ending winter in NYC. In order to remedy the winter blues we had taco night with margaritas this past weekend. Lots of margaritas.

We tried making some crazy flavors but the ginger margarita rose to the top as my favorite. I used SNAP ginger liquor and a frozen can of limeade to make this subtly spicy treat. Now I can’t wait for summer so I can sip on one of these on a sunny day in the park!

    Ginger Margarita

1 part tequila
1 part ginger liquor(snap or domaine de canton)
1 part frozen limeade
Splash of soda water

In a blender combine tequila, limeade, and ginger liquor with a handful of ice cubes. I like to use the container the limeade comes in as my measuring cup. Blend until smooth. Serve in a rocks glass topped with a splash of soda water and a lime.

20140310-195826.jpg

Enjoy!
-Charlie

Leave a comment

Filed under Drinks, New York City, Party Entertaining Ideas, Quick & Easy, Small Kitchen Cooking, Spring, Summertime

Buffalo Cauliflower ‘Wings’

Did you know today is allegedly the 50th anniversary of the creation of Buffalo Wings? Neither did I until I was skimming through The Gothamist and came across an article to celebrate the occasion. I knew it was a sign that I needed to post on Thrifty Foodies. I’ve been sitting on this recipe since the super bowl and have made it multiple times.  As a mostly vegetarian household we can’t have traditional buffalo chicken wings. In my food journey I’m amazed that there are so many different ways to cook veggies beyond roasting them. Often I find that I need to remind myself of this because I’ll usually roast, season, and call it a day. Here’s a vegetarian take on Buffalo Chicken Wings which prove that a little bit of preparation can turn something that’s supposed to be unhealthy into an absolutely fantastic and healthy treat. I found a variation of this on the PETA website but have edited it to my needs. I’ve was so pleased with the satisfying crunch that accompanied my faux buffalo wings.

Buffalo Cauliflower ‘Wings’

1 head of cauliflower
1 cup flour
1 cup milk
1/4 cup nutritional yeast
3 tsp garlic powder
2 tsp onion powder
1 tsp poultry seasonings
1 tsp crushed red pepper

1.5 cups Panco bread crumbs

Separate cauliflower into small pieces. Whisk together spices, flour, and milk. It will be the consistency of pancake batter. Pour panco in a separate bowl.

Dip cauliflower pieces in batter, roll in breadcrumbs, then place pieces evenly spaced onto a baking sheet. Repeat with each piece of cauliflower. Bake at 450 degrees for 20 minutes. Remove from oven and toss pieces in buffalo sauce. Bake for an additional 5-10 minutes until golden brown.

Serve with ranch or blue cheese dressing!

Enjoy
-Charlie

20140306-183501.jpg

Leave a comment

Filed under Appetizers & Snacks, Lunch, Party Entertaining Ideas, Quick & Easy, Side Dishes, Small Kitchen Cooking, Snacks, Spring, Vegetarian

Crock Pot Hash Brown Casserole

Hello Friends-
I hope everyone had a wonderful holiday season and beginning of the new year. Mine sure was (and continues to be) busy! I’m sure y’all could tell from the lack of Thrifty Foodies posting.  When things get busy the last thing I want to do is get home and cook so I’ve been using my crock pot like my life depended on it.  Nothing is better than waking up with breakfast waiting for you. On Christmas morning this year I made the most scrumptious overnight crock pot breakfast. It was so tasty that I’ve made it several times since to have something warm for breakfasts during the hectic work weeks. What I loved about making it multiple times was how it really turned into a clean out the pantry breakfast where i could mix and match veggies, cheeses, and meats.

Crock Pot Hash Brown Casserole


1.5 cups nonfat milk
6 egg whites

6 full eggs
1 cup shredded cheese- I used part skim Mexican blend

1 cup finely diced carrots
1 cup diced onion
1 cup diced green pepper
1 cup crusty bread, torn into bits
2 cups frozen hash browns

1 tsp black pepper
1 tsp Italian seasonings
1 tsp garlic powder
1 tsp rosemary
1 tsp salt

Additional Ingredients you can add: browned sausage, bacon bits, ham, mushrooms, spinach, broccoli

In a large bowl whisk together eggs, milk, seasonings, and cheese. Spray a 6 quart crock pot with nonstick spray. Add veggies, frozen hash browns, and crusty bread. Pour egg mixture over the top and use a wooden spoon to break up the hash brown bits and combine everything together. Cook for 6-8 hours on low until the eggs have set and the sides begin to brown and pull away.

20140130-080629.jpg

I promise it tastes better than it photographs 🙂

Enjoy!

~Charlie

Leave a comment

Filed under Breakfast, Quick & Easy, Small Kitchen Cooking, Vegetarian, Winter

A Thrifty Thanksgiving: Apple Cider Glazed Faux Turkey (Quorn Turk’y Roast)

I think being a vegetarian around the holidays can be the WORST. Every big holiday meal is centered around a beautiful roasted turkey.  Yes there are all sorts of delicious side dishes that can be made to offset not being part of the main event but what happens when you throw a thanksgiving dinner for a group that consists of mostly vegetarians?? This past thanksgiving I was faced with this dilemma.

Coming from Georgia, the holidays are always a big to-do in my family. Believe me- southerners know how to fill a table with fabulous food. My favorite was always a spicy cajun turkey. I tried my best last Thanksgiving to bring a taste of the south up north and make it as vegetarian friendly as possible.

20131011-160551.jpg

My findings include a tasty way to cook the fabled “tofurkey”– Let’s be honest: this faux log of a “bird” isn’t going to fool anyone. It’s awkward and funny looking BUT if seasoned correctly it can stand in and make quite an impression.  There are several brands that you can try but my favorite in all of my tastings was the Quorn Turkey Roast. If you’ve been a longtime reader of Thrifty Foodies you’ll know that I cook often with Quorn products because they don’t contain soy and have the most meat-like texture out of the variety of vegetarian products on the market.

As with most faux turkeys they all come packaged with ‘suggested’ cooking methods. Go ahead and do everyone a favor and throw those directions in the trash. The only way you’ll make this substitute taste remotely holiday worthy is to give it a  little TLC in the form of marinade and spices. Last year I cooked mine marinaded in veggie stock with a TON of poultry spices. I’ve whittled it down to a tasty apple cider marinade that makes the entire house smell amazing as guests arrive.  It is a little time intensive (as are most real turkeys) but give it a try and I guarantee you wont be disappointed.

20131011-160613.jpg

Apple Cider Glazed Faux Turkey (Quorn Turk’y Roast)

1 Quorn Turkey Roast
1 tsp poultry seasoning
1/2 tsp rosemary
1/2 tsp thyme
1/2 tsp sage
a few grinds of pepper
2 cups apple cider
1/4 cup soy sauce
1 small tart apple
mixture of baby carrots, chopped onion, parsnips, celery, cubed sweet potatoes, and cubed red potatoes
 
Remove all packaging from Quorn roast- Including the plastic wrapper that they suggest baking it in. Place roast in a gallon sized ziplock bag along with apple cider, soy sauce, rosemary, thyme, sage, and pepper. Close bag and shake it up to mix everything together. Place in the refrigerator and marinate overnight. 
 20131011-160601.jpg
 
When you are ready to cook the roast fill the bottom of a baking dish with a mixture of baby carrots, chopped onion, parsnips, celery, cubed sweet potatoes, and cubed red potatoes. Make a small indention for the roast to sit in the middle of the veggies and pour the sauce over everything. Make a few indentions down the body of the roast and slip a few pieces of the tart apple into them. Cook on 350 degrees for 1 hour and 20 minutes covered with aluminum foil. Uncover and cook for 20 more minutes.  At this point if your roast isn’t as golden brown as you would like it to be feel free to remove it from the pan and place it under the broiler for 5 minutes. 
 
 
Enjoy!
~Charlie
The Thrifty Breakdown:

Quorn Turkey Roast- $8.50
Carrots- bag for for $1.50
Sweet Potatoes- 2 for $1.00
Red potato- 1 for $0.25
Onion- 1 for $0.50
Apple Cider- 1/2 gallon for $2.50

Kitchen Staples: poultry seasoning, rosemary, thyme, sage, soy sauce, apple

This thrifty thanksgiving substitute made enough to serve four totaling $14.25 or around $3.50 a serving.

Leave a comment

Filed under Dinner, New York City, Party Entertaining Ideas, Small Kitchen Cooking, thrifty tips, Vegetarian, Winter

Pumpkin Carbonara (with vegetarian bacon)

20131028-195801.jpgLiving with a couple of vegetarians makes me yearn for the smell of bacon on lazy weekend mornings. Although I’m prone to get my fix when we hit up the diner after a late night, I’ve found there aren’t many ways to replicate that bacon taste in vegetarian land. The closest substitute I’ve come across is Morningstar bacon strips. I’ve found that I can never get the crunch I’m craving without a little bit of extra effort. After microwaving them according to the package directions I like to cut them into bits and put them under the broiler for 3 minutes in order to crisp them up. This pasta dish is the perfect place to use my ‘fakeon’ bits. I’ve been experimenting all month with pumpkin recipes and really enjoyed this savory take on an Italian classic.

Pumpkin Carbonara (with vegetarian bacon)
1/3 cup pumpkin purée
1/2 cup grated Parmesan cheese
2 eggs
4 strips Morningstar faux bacon(or real bacon if you’re not cooking for the vegetarians)
1 tsp rosemary
1 tsp sage

Bring a pot of salted water to a boil and cook pasta until al dente. While the pasta is cooking prepare your faux bacon and sauce. In a small mixing bowl stir together pumpkin purée, parmesan, rosemary, sage, and eggs. Once the pasta is finished cooking remove from heat and reserve 1 cup of the starchy cooking water. Drain pasta but DO NOT rinse. Toss pasta in egg mixture for 2 minutes until the cheese is melted and egg is cooked. If the sauce is too think for your tastes add in starchy water a few tablespoons at a time.

Enjoy!
-Charlie

The Thrifty Breakdown:

Pumpkin- 1 can for $2.50
Pasta- 1 box for $1.50
Parmesan Cheese- $3.00
Eggs- $1.50 for 12- $0.25
Bacon- $4.00 for 18- $0.88

Kitchen Staples: rosemary, and sage

This tasty autumnal pasta made enough to serve three and have a teensy bit of leftovers to snack on later totaling $8.15 or $2.17 a serving.

Leave a comment

Filed under Dinner, Lunch, Small Kitchen Cooking, Vegetarian

Personal Apple Pies with Cheddar Cheese Crust

20131010-215048.jpg
Fall is officially in full swing. This past weekend Tom and I went upstate to Warwick, NY with a few friends for their annual apple festival. Warwick is a quaint town that gets overrun once a year by city dwellers looking to get in on the autumn festivity. My first year in NYC I happened upon the warwick valley winery and it’s become a personal tradition to go wine tasting and apple picking there every fall.
20131010-214833.jpg
With an abundance of apples and a light daytime work week, I set out to make a personal sized apple pie. I’m always a sucker for cheddar cheese on top of my apple pie so I played around with the concept of putting the cheese *inside* the crust and fell in love with the results. The crust tastes like one of those cheese straws that you would eat at a southern baby shower. My favorite part of the recipe is that you can save the dough for a few days in the refrigerator if you don’t use it all in one day….meaning you can have your own pie multiple times in a week. If your nice you can share but it’s almost too tasty to share!

20131010-214416.jpg
Personal Apple Pies with Cheddar Cheese Crust
—makes 3 personal sized pies

For the crust:
1 stick butter, extra cold
1 1/4 cup all purpose flour
3/4 cup shredded sharp cheddar cheese
1/4 tsp salt
1/2 tsp white sugar

For the filling:
2 large apples, diced into tiny matchstick sized pieces
1 small lemon
2 tbs white sugar
2 tbs brown sugar
1 tbs flour
1 tbs pumpkin pie spices

Make the dough:
In a food processor pulse shredded cheddar cheese until it resembles grated cheese. Using shredded cheese is a good way to cut down costs because in my neighborhood grated is more than double the price. Set aside cheese in the refrigerator so it stays cold while you prep the rest of the dough. Cut 7 tbs of the stick of butter into small pieces and place on a plate in the freezer. Save the remaining tbs for later. Fill a cup with water and ice- you’ll need this nearby as you assemble the dough.

In the food processor pulse together salt, 1/2 tsp sugar, and flour until combined. Working in batches pulse pieces of cold butter into the flour mixture. They should practically disappear to create a mixture the consistency of damp sand. After all of the butter has been pulsed into the mixture continue pulsing and add the ‘grated’ cheddar cheese. Slowly add in ice cold water 1 tablespoon at a time until the dough just starts to come together. This step really depends on how humid the kitchen is, what the weather is like, etc. I’ve used as little as 1 tbs and as much as 4 tbs when making dough. It’s important not to over mix in this step so stop right after it comes together. Once the dough forms, remove from food processor and shape into a disk. Wrap tightly in plastic wrap and refrigerate for 30 minutes.

Make the filling:
In a medium bowl squeeze out the juice from one lemon. Toss in apples, brown sugar, white sugar, and spices. Let the mixture sit while you prepare the crusts.

Assemble the pie:
After dough has rested, roll it out in between two pieces of plastic wrap. This is a good trick to keep the dough from sticking to the rolling pin. My personal pie pans are about 5 inches wide so I rolled it out to be about 1/8 of an inch thick and cut it in two pieces with enough dough to cover each one. Press the dough into the pan and cut around the edges to remove excess. You can save the excess, roll it out again, and use it to decorate the top of your pie. The final step before filling each pie with apples is to prick the entire crust with a fork to avoid bubbles. Fill each pie with apple filling, top with a few pats if the remaining tbs of butter, and bake on 425 degrees for 20-25 minutes until the crust is golden brown.

Happy fall adventuring!
-Charlie

1 Comment

Filed under Small Kitchen Cooking